I’ve used Discord to keep in touch with friends and family for a few years now. During the pandemic, our shared space made it so easy to get online for video games together or just hanging out to stay sane. Recently, though, Discord began rollout of mandatory age verification - critically, not by self-attestation but by requiring proof of age using government-provided ID. Even if this wouldn’t inconvenience me personally too much, I agree that it’s a lousy idea for many reasons. Even if the initial push was delayed due to the valid negative reaction from the public, the whole initiative is still corrosive to trust. So, why not explore alternatives?
I’m keeping my expectations realistic. This is first and foremost a learning exercise rather than an attempt to deploy something at scale. Still, learning what would be involved in tinkering with, and deploying, a self-hosted social network appeals to my curiosity. It’s more important to me to prove to myself that it can be done by an amateur standing on the shoulders of other developers, and that there is nothing inevitable about having to suffer changing terms and conditions that are not in your best interest. Clearly this will involve compromises, but there’s something to be said about having a social network for my circle that’s under our control, that we are responsible for, and which we are free to audit and tinker with to our satisfaction.
I’ve hosted a repository of my configuration and deployment files, including a quick start guide, on GitHub. Feel free to check it; the rest of this post is a more detailed journey of how and why I arrived at it!
The project
Rather than reinvent the wheel, I wanted to deploy one or more existing, free and open source services that would provide a Discord-like social network for a small group of friends and family. The ideal solution stack would:
Support text chat, voice and video calls, and group calls;
Support persistent conversations;
Support different groups for different people on the same server;
Support screen sharing in a group call;
Be something I could host on my home network or a VPS (rented hardware resource) in the cloud;
Rely on free and open source software.
I narrowed down my search to the Matrix and XMPP protocols. There are much more comprehensive guides online to the pros and cons of each protocol, but a very crude analogy is that a feature-complete Matrix implementation is comparable to Slack or Discord, while a feature-complete XMPP implementation is comparable to WhatsApp (unsurprising since WhatsApp is also based on XMPP). In the end, I settled on Matrix:
It supports features, like voice channels and threading, which are complex to implement or nonexistent on XMPP with existing extensions. Plus, the differences from Discord aren’t dealbreakers for my use case.
The user experience with commonly supported clients is much more similar to what my friends expect with Discord.
I went through an earlier exercise where I deployed a Snikket (XMPP) server. There’s a lot to recommend about Snikket - I have another post planned about what I learned from this experience - but I ran into two major issues:
Snikket has very convenient official mobile apps but no web or desktop client. This was a dealbreaker for my friend circle, since some of us primarily use Discord at the PC while doing something else (e.g. gaming).
My workaround was to host a web client, Movim, on the same rented cloud server and under the same domain name. For this, I needed to set up a reverse proxy. I was surprised at how hard I struggled to get it to play nicely with Snikket in the same docker compose configuration!
Snikket doesn’t seem to support persistent group voice chats, anyway. We use voice channels with screen sharing so frequently in Discord that eventually this just wasn’t going to work for us.
Special acknowledgment: I reached out to Jorge Aguilera regarding his excellent guide to setting up Snikket and Caddy with Docker, and he was very generous with his time and patience in helping me troubleshoot some issues. I look forward to revisiting that exercise in another post!
With that decision made, I then identified what services I would want to host as part of my small-scale social network solution. Each service would run in its own Docker container, defined and deployed with Docker Compose. (See the section on Docker for brief context if this is unfamiliar.) These are:
A Matrix backend server. Only a few server implementations are mature or actively developed. I decided to try out continuwuity rather than the reference implementation, Synapse, because the former seems to be regarded as more resource efficient and I plan on hosting it on a relatively cheap VPS.
A web client for Matrix. In contrast, there is a rich variety of supported Matrix clients. My friends and family might want a good default option, though, that will work on mobile devices and PCs alike. Self-hosting the web client means that they only need type their login credentials into a web app also controlled by me, not by an untrusted third party. Of the available options, Cinny seemed stable, feature-rich, and familiar to a Discord user.
A WebRTC service. Matrix backend servers like continuwuity support voice and video calling, but don’t actually implement it themselves. Instead, they delegate coordinating the calls themselves to a dedicated service. For simplicity’s sake, and to maximize my chances of correctly setting up Discord-like voice chat rooms, I followed the modern approach of MatrixRTC using LiveKit backend.
A reverse proxy. This is critical to running all of the above services under the same domain name on the same VPS. In short, a reverse proxy server is responsible for routing external requests to my IP address to the appropriate service running on the VPS. That way, even though the request for social.mydomain.com on port 443 and for livekit.mydomain.com on port 443 end up at the same physical machine, the reverse proxy will route the first one to Cinny’s container’s port 443 but route the second to Livekit’s container’s port 443. I decided to use Caddy - it’s extremely simple to set up, seems robust, and handles TLS certificates automatically so I don’t have to! Plus, nearly every guide I referenced for self-hosting Matrix, including the official continuwuity documentation, provided at least some configuration (“Caddyfile”) templates for it.
How I did it
The playbook I followed for setting up my server from scratch looks like this:
Rent a VPS
Configure initial security precautions for the VPS
Get a domain name
Install Docker
Configure firewall
Set up DNS records
Generate LiveKit secret
Apply Docker daemon fix
Set up docker-compose file
Set up individual config files
Go live
In reality, the process of getting my small social network up and running was… much more iterative than this guide would suggest. While I am sharing the final working version of each step and necessary file here, I will also call out pitfalls I encountered and lessons I learned the hard way!
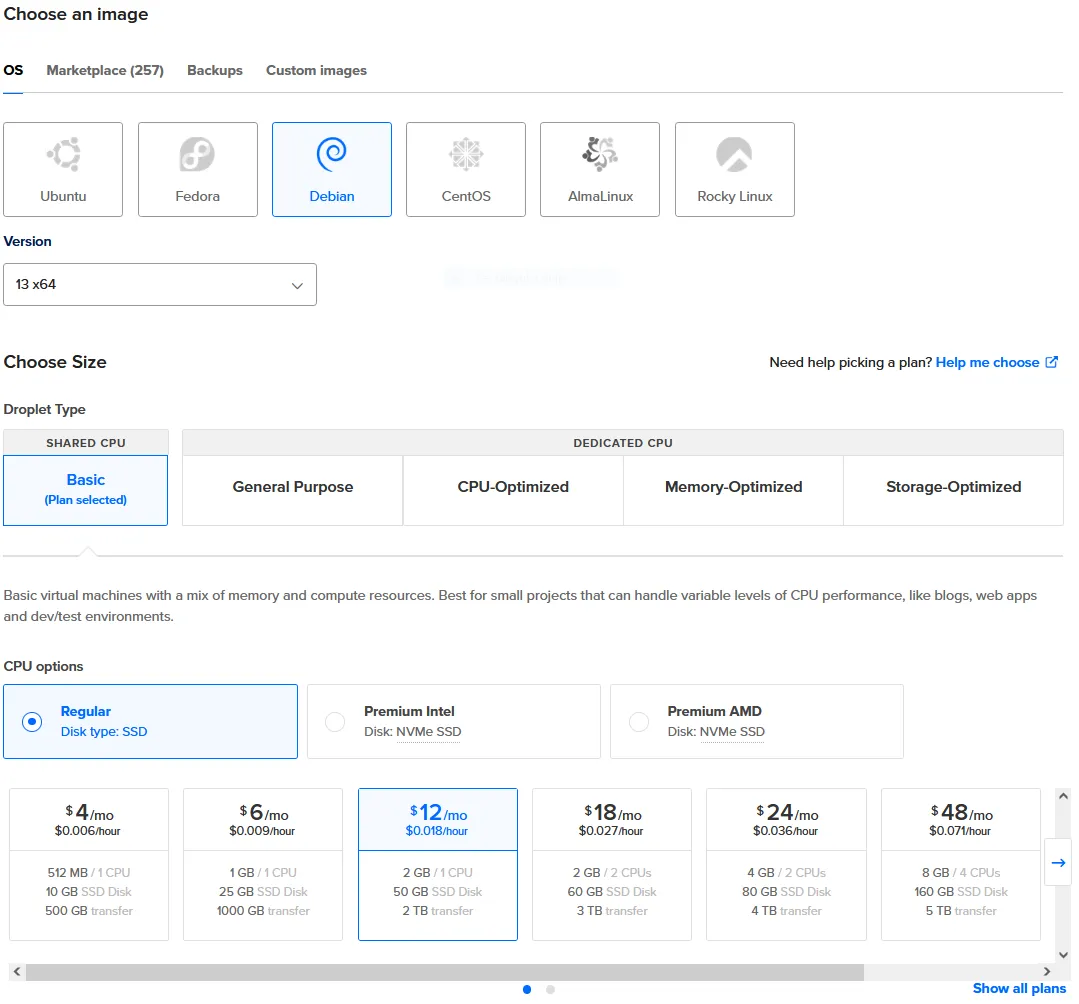
1. Rent a VPS
During my earlier research on XMPP servers, I found a referral link on the official Snikket quickstart guide for a DigitalOcean $200, 60-day credit. That’s an easy choice for a trial run!
I’d rather use a cloud server than host on my home network for security and reliability reasons, so a VPS it is. As long as my DigitalOcean VPS (“droplet” in their terminology) is running, its IP address will not change, so that also eliminates one more complication.
Key options I chose:
The cheapest basic size I could get with at least 2 GB memory.
SSH authentication only. I do not want someone guessing a password and commandeering my system!
IPv6 enabled. Why not?
2. Configure initial security precautions for the VPS
Immediately after starting up the VPS, I took some other common measures to add further security. (I suppose I could have put them in a script to run upon deploy, as DigitalOcean has that as an additional setup option, but I didn’t here.)
I used SSH to connect to my new VPS as the root user and:
Completely disable password authentication and non-root access:
sudo nano /etc/ssh/sshd_config (Open the config file)
Change the (possibly commented out) line with PasswordAuthentication to end with no and not start with a #.
Change the (possibly commented out) line with PermitRootLogin to end with no and not start with a #.
Create a new admin user:
sudo useradd -m aaron (add a new user and home directory)
sudo passwd aaron (set the password; note that SSH is still required to connect in the first place)
sudo usermod -aG sudo aaron (add the user to the admins group)
Now I can disconnect and reconnect as aaron.
Note that by default, a new DigitalOcean VPS will only have port 22 (SSH) opened through the firewall. In a later step, I will describe
3. Get a domain name
Any domain registrar will do; I already use Cloudflare for other services, so I found a catchy .com domain name that I could reserve for about $10/year. Let’s call it “mydomain.com” for illustration purposes; I’ll reuse it for future projects and prefer to keep it private for now.
4. Install Docker
To grossly oversimplify, Docker is a core technology for deploying other software applications on the same computing environment in an isolated and reproducible way. Deploying applications, like the services I need for my self-hosted social network, via Docker has a few advantages:
After defining and building a recipe for a self-contained environment for the app (an “image”), it will run identically regardless of what hardware or operating system deploys it.
These deployed self-contained app environments (“containers”) are easier to isolate from each other than if the apps were simply running at the same time on the host operating system without Docker as an intermediate layer. This can improve security (if one container is compromised, the host system isn’t necessarily) and reliability (a crashed container won’t necessarily bring others down with it).
Docker makes it easy to automate managing these containers, for example gracefully restarting a service if it crashes.
Since I chose to run the Debian operating system on my VPS, I was able to follow the installation instructions here, with one major exception. The step to set up the apt repository include the following line:
This did not work at all for me. Instead, I needed to look up my Debian version manually and substitute the release name here. For example, when setting up the VPS, I chose Debian version 13 x64, which corresponds to “Trixie”. This means the line should instead be:
Suites: trixie
5. Configure firewall
The individual services running in Docker containers will need access to the outside internet. While the reverse proxy service will route incoming requests to the right port for the right container, the ports that the reverse proxy will listen on need to be opened up in the VPS’s firewall. These are:
80 (HTTP)
443 (HTTPS)
8448 (Matrix)
7880:7881 TCP (LiveKit, i.e. voice and video calls)
50100:50200 UDP (as above)
8081 (LiveKit JWT service)
3478 UDP (TURN from LiveKit)
50300:50400 UDP (as above)
There are many ways to do this, but I just used DigitalOcean’s firewall dashboard.
As shown in the screenshot, only the first port in a range (e.g. 7880 for 7880-7881) is shown for each rule; I don’t know why it’s displayed that way, but the firewall did behave as expected.
6. Set up DNS records
I need to make sure that when a user tries to send a request to social.mydomain.com (stand-in for my actual domain name), it gets routed to my particular VPS - that is, to its actual but not particularly memorable IP address. Because I registered my domain name through Cloudflare, I was able to use their dashboard for DNS record management to set this up easily.
I added the following DNS records to map my domain name to the less-memorable IP addresses for my VPS:
Type
From
To
A
mydomain.com
my VPS’s IPv4 address
AAAA
mydomain.com
my VPS’s IPv6 address
The following records establish aliases for mydomain.com. These are useful because the reverse proxy server (Caddy) can route requests based on the URL that the requester chose:
Type
From
To
Purpose
CNAME
matrix.mydomain.com
mydomain.com
Represents the Matrix backend server
CNAME
social.mydomain.com
mydomain.com
URL for the Cinny web client
CNAME
livekit.mydomain.com
mydomain.com
Represents the LiveKit backend server
7. Generate LiveKit secret
LiveKit requires a server-side secret to be generated. I used continuwuity’s recommended approachdocker run --rm livekit/livekit-server:latest generate-keys. In the files docker-compose.yml and livekit.yml described below, replace MyLiveKitKey with the key and MyLiveKitKeyValue with the value.
8. Apply Docker daemon fix
Originally, I did not perform this step, and upon deployment I still had a workable social hub up and running.
After just three people joined, I started seeing issues with inability to join new rooms and slow performance. Turns out that over 90% of the VPS’s 2GB of RAM was being consumed! No one process seemed to be at fault, but there were dozens of docker-proxy processes running. I did some background reading on this phenomenon, and followed the suggestion to add to /etc/docker/daemon.json:
{
"userland-proxy": false
}
After restarting Docker and the compose containers, this seems to have eliminated the memory overconsumption.
9. Set up docker-compose file
This file tells Docker how to orchestrate multiple Docker containers, one for each service, that are by default isolated but can interact and communicate with each other according to my configuration.
The continuwuity official documentation gives a detailed example for how to set up a Docker Compose file. I also referenced Tom Foster’s example for exposing continuwuity using Unix sockets. However, to the best of my knowledge, none of the existing walkthroughs for self-hosting Matrix completely covered my desired setup:
continuwuity and Caddy communicate via Unix socket
Caddy itself runs in a Docker container
Web client (e.g. Cinny) also hosted on the same machine in a Docker container
Here are the full contents of my docker-compose.yml file, followed by commentary:
Both continuwuity and caddy services have a volume mapped to /run/continuwuity:/run/continuwuity. This is the Unix socket they communicate over, which is a more performant option as long as they are hosted on the same machine.
The only two services with any open ports for inbound requests are rtc-livekit, rtc-jwt, and caddy.
-rtc-livekit makes MatrixRTC connections for voice/video calls on ports which don’t overlap with any other service.
I was not able to get rtc-jwt to work when explicitly specifying open ports e.g. 8081. I had to resort to network_mode: host for this service.
caddy of course handles the routing of any other HTTP, HTTPS, or port 8448 (Matrix federation) requests to the other services.
The ./static directory contains the well-known files to be served when requested by another Matrix client or server. See examples of these below.
Make sure MyLiveKitKey and MyLiveKitKeyValue are substituted as per step 7 above.
10. Set up individual config files
Caddyfile
This file determines how the Caddy server will route requests, including as a reverse proxy. Its contents are:
The first block, for mydomain.com, serves the “well-known” files which tell other Matrix servers and clients where to make various service requests.
The second block, for matrix.mydomain.com, mydomain.com:8448, routes all Matrix traffic to the continuwuity container. In particular, note that it routes those requests to the Unix socket rather than another network address.
The third block, for social.mydomain.com, routes any requests at that subdomain to the web client. (Note that this client will of course make requests to my homeserver at matrix.mydomain.com, which will then get sent via Unix socket… This should be pretty efficient since all these services are hosted on the same VPS!)
The final block, for livekit.mydomain.com, routes token-related requests separately from any other LiveKit requests.
static/well-known
The client file gets served to a Matrix client that tries to connect to my homeserver, and provides it the correct addresses for relevant services:
The server file does the same for a Matrix server making the request, which means this is most relevant for federation. I don’t intend to make use of federation, but still provide this:
{
"m.server": "matrix.mydomain.com:443"
}
The support file is fairly minimal too, but may be a good idea to have anyway for a large enough private server:
{
"contacts": [
{
"matrix_id": "@admin:mydomain.com",
"role": "m.role.admin"
}
]
}
continuwuity.toml
Continuwuity supports a massive number of configurable properties, with varying levels of documentation. The reference template for the config file is here, but I stripped it down to the bare essentials for my private server. Commentary follows:
unix_socket_path, database_path, etc. must match what’s in the docker compose file and others.
registration_token should be difficult to brute-force, but easy to share: this is the passcode that users must provide in order to register an account. I made this a memorable phrase that I could hand out to my friends and family. It’s probably a good idea to rotate this periodically; I’m sure there’s a good way to generate a unique one of these if managing invites separately, but I did not investigate.
There’s a known failure mode of LiveKit when federation is disabled, which poses a problem for servers that should be private but also support voice calls. The workaround is to enable federation but put all other Matrix servers on the blocklist. Hence, allow_federation = true but forbidden_remote_server_names = [".*"].
livekit.yml
The config is as follows:
port: 7880
bind_addresses:
- "0.0.0.0"
logging:
level: debug
rtc:
tcp_port: 7881
port_range_start: 50100
port_range_end: 50200
use_external_ip: true
enable_loopback_candidate: false
turn:
enabled: false
keys:
MyLiveKitKey: MyLiveKitKeyValue
One comment: I was not able to get a working deployment when changing this config to support both MatrixRTC and TURN/STUN, even though LiveKit apparently includes a built-in TURN server. I figured that setting turn: enabled: false is good enough, since I don’t expect any of my users to deliberately choose a Matrix client that doesn’t support MatrixRTC.
cinny_config.json
Finally, here is the config file for the Cinny web client.
{
"defaultHomeserver": 0,
"homeserverList": [
"mydomain.com"
],
"allowCustomHomeservers": false,
"features": {
"registration": true,
"guest_access": false
}
}
There is only one server in the homeserverList - mine! Setting this to be the default makes the UI nicely emphasize that this is the only option.
Registration can be done through the web client as well. Note the registration_token from above must be provided at that time, so I made sure to share this with my users in advance.
The config file doesn’t seem to support any options for personalizing the appearance of the web app. For that, I would need to modify the source files or public static files (e.g. CSS, SVG images) and then rebuild the docker image. I didn’t bother doing that yet, but would like to!
11. Go live
Spin up the services with sudo docker compose up -d.
To create the first admin user (with username… “admin”), run in the same terminal session sudo docker exec -it continuwuity users create-user admin <password> for some desired value of <password>.
In practice, I took a slightly different approach. My docker-compose.yml originally included, under the continuwuity service block, command: /sbin/conduwuit --execute "users create-user admin" to do this upon first startup. I then inspected the logs for the continuwuity container with sudo docker logs -f continuwuity, to recover the login info:
continuwuity | │ INFO│comman│@admin:################ has been │
continuwuity | │ │ d │invited to the admin room as the │
continuwuity | │ │ │first user. │
continuwuity |
continuwuity | Created user with user_id: @admin:################
continuwuity | and password: ################
Then, I updated the docker-compose file to change the command statement for the continuwuity container back to command: /sbin/conduwuit, took the services down with sudo docker compose down, then started them again.
I don’t recommend this approach.
After that, I connected to social.mydomain.com in a browser and registered my non-admin account, and shared the news with my initial testers!
Concluding thoughts and acknowledgments
Overall, I’m pretty impressed with how well this runs for a small, private server. The user experience is similar enough to Discord or Slack that I could definitely overlook the rough edges that come with these being noncommercial, community projects. Besides, there always exists the opportunity to contribute code changes through a pull request.
Putting together the deployment pieces seems straightforward in hindsight, but this was a longer journey than I expected. The most critical gap in my knowledge coming in to this was on reverse proxies, so I was fortunate that Caddy seems to have been so much simpler to work with than, say, Nginx or Traefik. Finally, I couldn’t find one comprehensive guide that incorporated all of my requirements, so as often happens, much of the effort came from comparing and reconciling multiple references.